Building an outdoor stone fireplace might seem overwhelming at first, I know because I’ve been there, standing in front of a pile of materials, wondering how to start without making costly mistakes. But trust me, with the right plan and a step-by-step approach, it’s completely doable. In this guide, I’ll take you through the process, from laying the foundation to installing the final chimney cap. By breaking it down, you’ll see that creating a stunning outdoor stone fireplace is easier than it seems!
How to Build an Outdoor Stacked Stone Fireplace
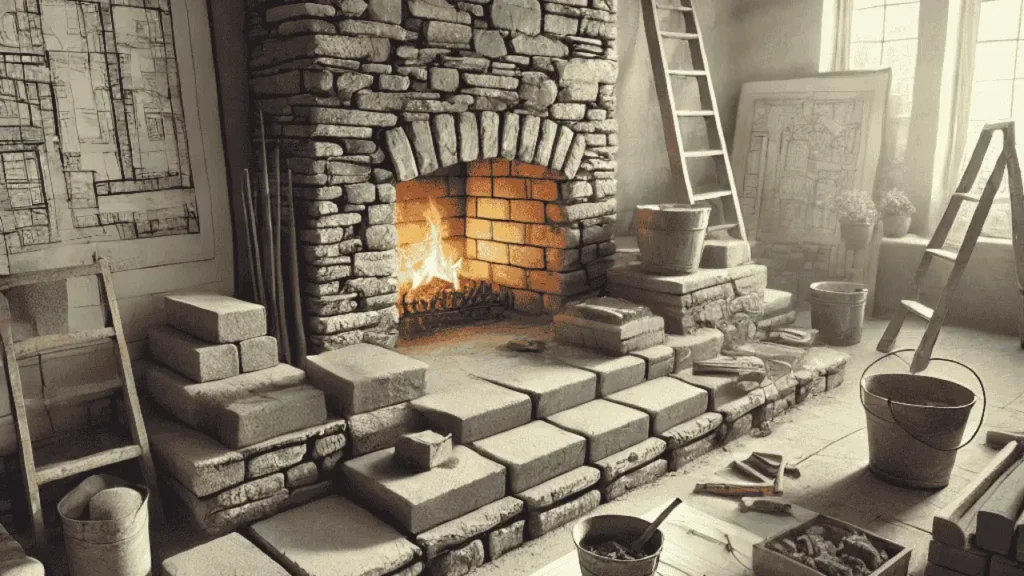
Building an outdoor stacked stone fireplace can seem like a big project, but when broken down into steps, it’s totally manageable. We’ll go through everything, from creating a design to laying the foundation, building the frame, and finally adding stacked stone. By the end, you’ll have a beautiful, functional fireplace that will be the centerpiece of your outdoor space. Let’s get started by gathering the materials!
Materials Needed:
- Concrete mix
- Rebar
- Wooden stakes and boards
- Cement boards
- Mortar mix
- Stacked stone veneer
- Chimney cap
- Masonry tools (trowel, level, etc.)
- Wood for framing
- Screws and nails
Step 1: Create a Design
The first step is to plan out the design of your outdoor stone fireplace. Think about its size, shape, and location in your yard. When I built mine, I sketched a simple blueprint to guide the process, it really helped to visualize the end result. Decide if you want a straight or curved design and whether you’ll include extra features like a mantel or seating area. Having a clear design will make the rest of the process much smoother.
Step 2: Create a Concrete Foundation
Now that you’ve got your design, it’s time to build the foundation. A sturdy base is key to supporting your stone fireplace. Start by digging out the area where the fireplace will sit, making sure it’s level. Then, lay rebar for reinforcement and pour the concrete mix into the space. Let it set and cure completely before moving on. A solid foundation is the backbone of the entire structure, so take your time here!
Step 3: Lay Concrete
With the foundation set, it’s time to lay the first layer of concrete. This layer will act as the base for your fireplace’s structure. Pour the concrete evenly over the foundation and smooth it out using a trowel. Make sure it’s level to avoid any issues when building the frame. Let the concrete fully cure before moving to the next step, this ensures a stable and lasting base for your fireplace.
Related: Hanging Stockings on a Stone Fireplace
Step 4: Build a Façade Frame
Now, let’s build the frame that will support the fireplace façade.
Assemble Wood for Outdoor Fireplace
Start by cutting the wood to match your design measurements. These wood pieces will form the structure behind the stone, providing the framework that holds everything together.
Frame Up Wood for Outdoor Fireplace
Next, assemble the wood into a sturdy frame. Use screws or nails to secure the pieces together, ensuring the frame is level and strong enough to support the stone.
Outdoor Fireplace Frame
Once the frame is assembled, position it on the concrete base. Double-check that everything is aligned and secure before moving on to the next step. This frame will give shape and structure to your outdoor fireplace.
Step 5: Attach Cement Board
With the frame in place, it’s time to attach the cement board to create a surface for the stone.
Attach Cement Boards to Outdoor Fireplace
Cut the cement boards to fit around the frame, making sure each piece covers the structure. Secure the boards using masonry screws, ensuring they’re tightly fastened for stability.
Frame for Outdoor Fireplace
Once all the cement boards are attached, inspect the frame to make sure everything is even and well-secured. The cement board provides a solid, fire-resistant base for applying the stone, ensuring a durable and safe finish.
Step 6: Add Mortar
Now it’s time to apply the mortar, which will hold the stacked stone in place.
Mix Mortar for Outdoor Fireplace
In a large bucket, mix your mortar according to the package instructions. I found it helpful to mix small batches to keep it from drying out too quickly while working. Make sure the consistency is thick but spreadable.
Apply Mortar to Outdoor Fireplace
Using a trowel, spread a generous layer of mortar onto the cement board. Work in small sections, applying enough mortar to hold the stone securely but not so much that it oozes out between the gaps. It’s important to take your time here to ensure a strong hold for the stone.
Step 7: Install Stacked Stone
Now, it’s time to install the stacked stone and bring your fireplace to life.
Attach Stacked Stone to Outdoor Fireplace
Starting from the bottom, press each stone firmly into the mortar. Make sure to stagger the stones for a natural, layered look. As I worked on mine, I found it helpful to step back every so often to check for evenness and adjust as needed. Continue this process until the entire surface is covered, wiping away excess mortar as you go for a clean finish.
Step 8: Attach Chimney Cap
The final step is to install the chimney cap. This is essential for protecting your outdoor fireplace from weather damage and improving airflow. Simply place the cap on top of the chimney and secure it with screws or clamps, depending on the design. Make sure it’s tightly attached to avoid any issues down the road. Once the cap is in place, your stacked stone fireplace is complete and ready to enjoy!
Just In: How to Remove Stone Fireplace Surround in Simple Steps?
Final Takeaways
Building an outdoor stacked stone fireplace may seem challenging, but by following each step, from designing and laying the foundation to installing the stone and chimney cap, you can create a beautiful, functional addition to your outdoor space. With the right tools, materials, and a little patience, you’ll have a stunning fireplace to enjoy for years to come. Happy building!

- How to Seal a Fireplace Insert? - April 23, 2025
- What Is the Lever on the Side of My Fireplace? - April 22, 2025
- What Is a Fireplace Fireback? - April 21, 2025